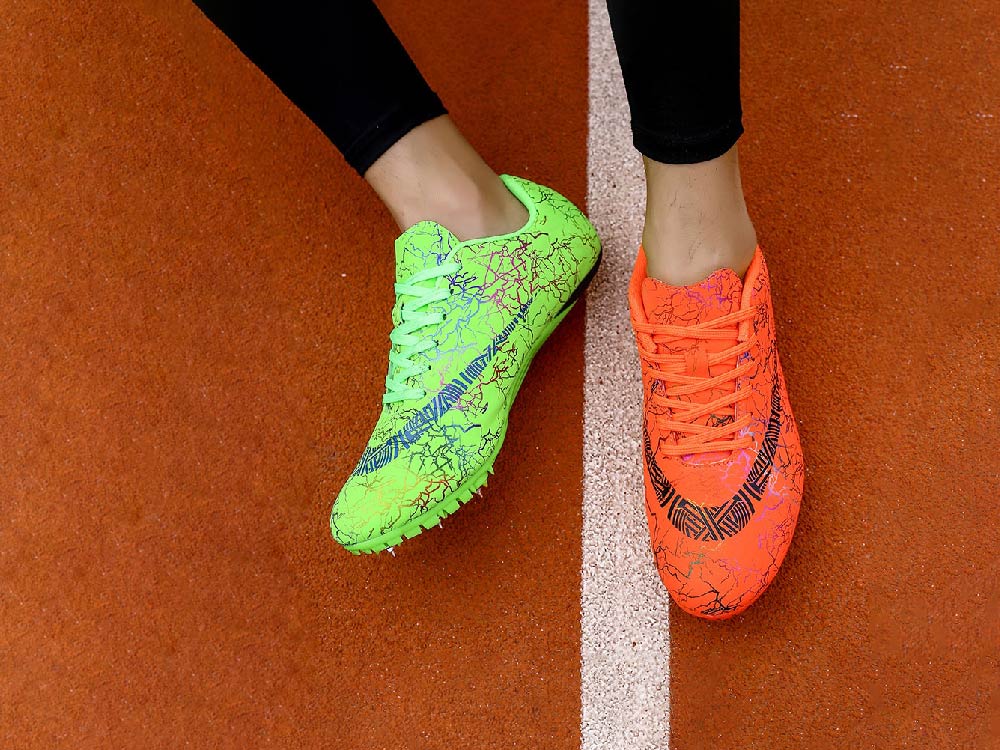
The use of spikes for track running is one of the best ways to guarantee you run your best times on race day. Not all track shoes or running spikes are created equally though, so check out the tips below for getting the most from your track spikes.
Choosing The Correct Track Shoe
When it comes to track shoes, they are not all built the same. The distance you are running will influence which style of shoe you buy. If you run multiple distances but only want to buy one pair of shoes, this is okay, just keep in mind that you won’t have the best footwear for some of your distances. Track spikes are generally broken down into 3 categories:
Sprinting Spikes - Sprinting spikes are built around an aggressive and stiff spike plate that runs from the toes to the heel. The plate is stiffest at the toes. Sprinting spikes are designed for the 100 and 200 meters, as well as the 400 meters. Most sprinting spikes feature 8 or more holes for spikes, located at the front of the foot. This combination provides maximum traction on a track.
Mid-Distance Spikes - Mid-distance spikes are stiff, but offer some flex. They generally feature 4-8 holes for spikes, located at the front of the shoe. While not as aggressive as a sprinting spike, they still provide enough stiffness. Mid-distance spikes are ideal for 800, 1500, 1600 and 1-mile distances, although they can also be used for shorter events like the 400 meters, and longer events up to 5000 meters. If you are looking for a pair of shoes to wear across multiple events, mid-distance spikes are your best option.
Long Distance Spikes - Long-distance spikes are essentially racing flats with holes for spikes. Usually, these shoes only feature 4 holes, just enough to give you some traction through the turns. These spikes are designed to be very light to keep your turnover as fast as possible. Because of this, they offer minimal support and are only recommended for distances of 1500 meters or longer. They don’t feature the support or aggressive spike plates required for shorter running events.
One thing to keep in mind when choosing shoes is your injury history. If you have had achilles injuries in the past, you will most likely want to avoid shoes with a full-length rigid spike plate. This style puts all the pressure on your achilles tendon. For this reason, some runners will train in a shoe with a half-plate, but race in a full-plate shoe.

Spike Size and Style
There are many different sizes of spikes, as well as styles, depending on your running surface. Choosing the correct spike is important for getting the most from your shoes. There are also different materials to choose from.
Size - Spikes come in all sorts of lengths, from 3mm up to 15mm in length. Most default spikes are 6mm, which is the most versatile size and will work on most track surfaces. The most commonly used spike sizes used for both outdoor and indoor tracks are between 3 and 6mm.
Shape - When it comes to the shape, the surface you are running on will have a lot to do with your selection. Pyramid spikes are the most common, as they are a good all-around spike. Needle spikes are thinner, and are the best choice for rubber tracks, as they “stick” to the surface. Christmas tree spikes are for rubber tracks where you don’t want to “stick”. Tartan spikes are dull and will stick to a rubber surface the least.
Blanks are flat studs that should be screwed into any unused holes to keep debris out and protect the threads.
Material - Spikes can be made from several different materials, including steel, ceramic and titanium alloy. Steel is more durable, while titanium alloy is lighter. Spike material is often a matter of preference, so try out a few styles to see which works best for you. Certain tracks may only allow particular styles and sizes of spikes, so it is best to keep some different styles and sizes in your track bag, just in case.
Spike Location
Most runners will just put spikes in every threaded hole in their shoes, but there are other ways to go about spiking your shoes. Previously, runners were only allowed to have 6 spikes for track events. However, that changed in the ’90s allowing for up to 11 spikes per shoe now (If your shoe even holds that many spikes).
Runners who specialize in short, straight events like the 100 meters will often spike their shoes symmetrically. However, runners who run track races with fast turns (ie 200 meters) will often spike their shoes to get the most grip through the turn. This means placing spikes on the inside of the left shoe, and the outside of the right shoe. This will give you maximum grip through the corners as your weight transfers to right where the spikes are placed.
Proper Fit for Spikes
Unlike normal running shoes, where you want some room between your toes and the front of the shoe, track spikes should fit snugly. When trying a pair on, they should feel secure without cramping, and your toes should be near the front of the shoe, but not actually touching it.
One thing to keep in mind when using track spikes is that they aren’t going to feel as comfortable as normal running shoes. They are built to secure your foot and provide traction, not for comfort. A good-fitting pair of spikes will feel snug, but not be uncomfortable or cause cramping.
If you have wide feet, finding a set of track spikes that fit properly can be a bit tough, as most manufacturers make their spikes narrow, as they should fit snugly. If you are having issues with width, try going up a shoe size.

Removing Damaged Spikes
Most of the time the supplied track wrench that comes with your spikes is enough to get a stuck spike out. If that doesn’t work, use a good pair of pliers and grip the spike as close to the shoe as possible. That should give you more than enough leverage to get even the most stuck spike out.
If you have a spike (or spikes) that are worn right down to their base, use a hacksaw and cut a groove in the spike. This should allow you to use a slot screwdriver to turn the spike.
When used properly, track spikes can help unlock your full potential when running on a track. Getting the most out of your spikes means having the right style for your chosen distance, as well as having them set up properly. Just going out and buying the most expensive pair you can find won’t necessarily make you a faster. Do your research first, select the proper style and then set them up for your best performance on race day.

